Tuesday, 31 March 2015

Masala Papad-::::::::;Zero Oil -)))))))))))))))))))))))Indian Cuisine*****************-Quick and Easy Starter-#######Tasty Starter-

Hello Friends!!!!!!!!

Masala Papad is one snack which we all enjoy when we dine out before our main course comes. This masala papad actually differs from each place and each person's prepartion. In north India it is prepared with varieties of chutneys on the base but here in south India they serve in different manner. Masala papad is my husband's favourite starter and for me it depends on my mood.Sometimes i like and at times i dont. I love masala papad in Novelty Tea House at Mylapore,Chennai. I generally prepare this masala papad at home with pepper papad.I get these pepper papads in Ambika Appalam, the famous shop in Chennai for all kinds of papads for many years. I get the big one so that when i microwave it, it will be a perfect papad. I dont fry these papads in oil.I just microwave this papad for a minute and then start making the masala papad. This is a quick snack which you can make for guests at home and if you feel bored of your regular stuffs. You try this Ambika Appalam and their varieties,trust me you will love it. You can visit them in http://www.ambikaappalamdepot.com/
This masala papad is great Indian starter to taste and it's very very easy to prepare.

So now let's see how to make this masala papad!!!!!!!!!!!!!

Cooking Time                      :  1 Minute

Preparation Time                 : 5 Mins

Ingredients:

1.)Pepper Papad                     - 1 No

2.)Onions                               -As shown in the picture

3.)Tomatoes                          -As shown in the picture

4.)Green Chiilies                  -As required

5.)Coriander Leaves             -To garnish

6.)Sev                                   -To garnish

7.)Lemon                             - To squeeze

8.)Amchur/Mango Powder - 2 pinches

9.)Dhaniya Powder              -2 pinches

10.)Chilli Powder                -As required

11.)Chaat masala                -2 Pinches


Method:

1.)Take one pepper papad and microwave the same for 1 minute and keep it aside.


2.)Now add the chopped onions to this papad.


3.)Now sprinkle ingredients No.8,9 and 10.


4.)Then add tomatoes,sev,green chillies and sprinkle chaat masala now.


5.)Add lemon juice now and garnish with coriander leaves.


Enjoy your hot Masala Papad starter!!!!!!!!!!!!!>>>>>>>>))))))))))))))))))))))))))


Note:

1.)If you want you can use some chutneys like green chutney as a base like they do in North India.

2.)If you want you can apply some tomato sauce in the base .

3.)Any other innovations if you want you can add to this papad and let me know that also....!!!!!You can use corn kernels,some cornflex, some peanuts, curd at the base,mint leaves, etc. So food is all about innovation.So enjoy your papad.

Bon Appetit!!!!!!!!

Ishwarya Balaji

Thursday, 26 March 2015

Arrabbiata Sauce-Pasta Sauce-Italian Cuisine-sugo all'arrabbiata:)))))))))))

Hello friends......)))))))))

Sorry again for a week's delayed posts.My little princess was not feeling well due to her vaccination.I has some messages regarding chutneys which I will post very soon. Today we are going to see a western recipe which is my all time favourite. We are going to see Arrabbiata Sauce .

Arrabbiata sauce is one sauce which I love the most . Actually it would be spicy but on request they make less spicier. So I wanted to try this for a long time and so last weekend I tried the same. Arrabbiata sauce originated from Italian Cuisine and Arrabbiata in Italy literally means angry.Trust me homemade Arrabbiata sauce is awesome and it is very easy too. Arrabbiata sauce is spicy and it is generally served hot over the penne pasta.But nowadays we can see this tasty sauce used in varieties of spagetti too. There are variety of pasta sauces but mostly if you see tomatoes are the base in all sauces. I love pasta sauces in certain places in Chennai like Hyatt , Cream Center and in Pondicherry Pasta Veneto and many places. But if you find time try out the pasta,spaghetti and sauces in Hyatt Chennai. It is really mouthy watering and everything is made fresh on spot and you can also participate to select the ingredients with the chef for your plate. Now let's see how to make this Arrabbiata sauce .

Cooking Time                  :     15-20 Mins

Serving                            :      3 persons

Ingredients :

1.)Tomatoes                      -  4

2.)Onion                           - 1 cup chopped (Ref my measurements)

3.)Garlic Pods                  -1 cup chopped (Ref my measurements)

4.)Red Chillies                 -As required 

5.)Salt                               -As required

6.)Olive Oil                      -As required

7.)Tomato Puree              -1 can/sachet(Small one)

8.)Water                          -As required


Method:

1.)Boil the tomatoes with enough water where all the tomatoes can be immersed fully. I boiled the same in microwave owen which is actually very easy.You can do it in normal gas also.


2.)Peel off the skin after boiling the tomatoes.You can insert a knife and see whether the tomatoes are boiled.


3.)Grind the peeled tomatoes into a smooth paste.


4.)Heat a pan and pour required olive oil and saute the chopped onions to it and fry them till they turn pink.


5.)Now add the chopped garlic pods and chopped red chillies.Here i have used normal red chillies and you can also use the red pepper ones.


6.)Add the grinded paste and add adequate salt at this stage and mix well.


7.)Now add the canned/sachet tomatoe puree and mix well.Tomatoe puree actually gives colour and thickness to this sauce.Here the ratio i used for canned tomatoe puree is

1 spoon of boiled tomatoe puree    : 2 and a half spoons of canned tomatoe puree

(I used normal big spoon and pls ref my measurements for the spoon)


Now your favourite Arrabbiata sauce is ready!!!!!!!!!!!!!!!!!!!!!!!!!!!!!!!!!!!!!!!!


Note:

1.)White onions can be used for this and it gives a better taste.

2.)This sauce tastes good only in olive oil so always use olive oil only.

3.)You can refrigerate this sauce for 2 days.

4.)You can cut the garlic pods into even more smaller pieces,since i was running out of time i could not .

5.)This sauce gets even more in red colour due to the tomatoes. Colour may slightly vary so no issues on that.

Bon Appetit!!!!!!!

Ishwarya Balaji


Thursday, 12 March 2015

Hot hOT..)))Moong Dal Kichidi-Simple Recipe-North Indian Cuisine-Healthy Recipe-Happy Weekend Folks

Hello Friends!!!!!!!!!!!!!!

Moong Dal Kichidi is a very simple recipe but yet a very very healthy one .North Indian Kichidis will be very tasty and i love those kichidis .This moong dal kichidi is my daughter's favourite one. She loves it. Moong dal by nature itself is very healthy and it has rich source of protein.And i prepare this moong dal kichidi in Basmati Rice only.This is one tiffin item which i make very often as it is very healthy. My husband also loves this. We usually have this for dinner but sometimes for breakfast too. It is a very wholesome food and you can make it one for all for the whole family. It is really a very simple recipe and it takes only few mins for you. So now let's see how to make the same!!!!!!!!!!!!


Cooking Time               : 15 Mins

Serving                          :2 People

Ingredients:

1.)Moong Dal               - One and a half cup(Cup-Pls ref my measurements post)

2.)Basmati Rice           - 1 Cup (Ref my measurements )

3.)Turmeric Powder    -1 and a half Pinches

4.)Salt                         -As required

5.)Olive oil/Ghee       -As required to saute

6.)Green Chillies       -As per your spice requirement

7.)Coriander Leaves -To garnish

8.)Cumin Seeds/Jeera-1 and a half spoons(Normal big spoon)(Ref my measurements)

9.)Water                     -As required

10.)Black Gram/        -Half a teaspoon((Normal big spoon)(Ref my measurements)
      Uluthamparupu

11.)Asafoetida          -A pinch


Method:

1.)Heat the pressure cooker and saute some ghee or olive oil in it .


2.)Now add the cumin seeds and saute till light golden brown.


3.)Add the green chillies.Chop them into circular pieces.Also add asafoetida now.


4.)Now add the moong dal and black gram in said quantities.


5.)Add soaked basmati rice now.Soak the basmati rice 20 mins before cooking. Add the required salt at this stage.


6.)Now add turmeric powder .


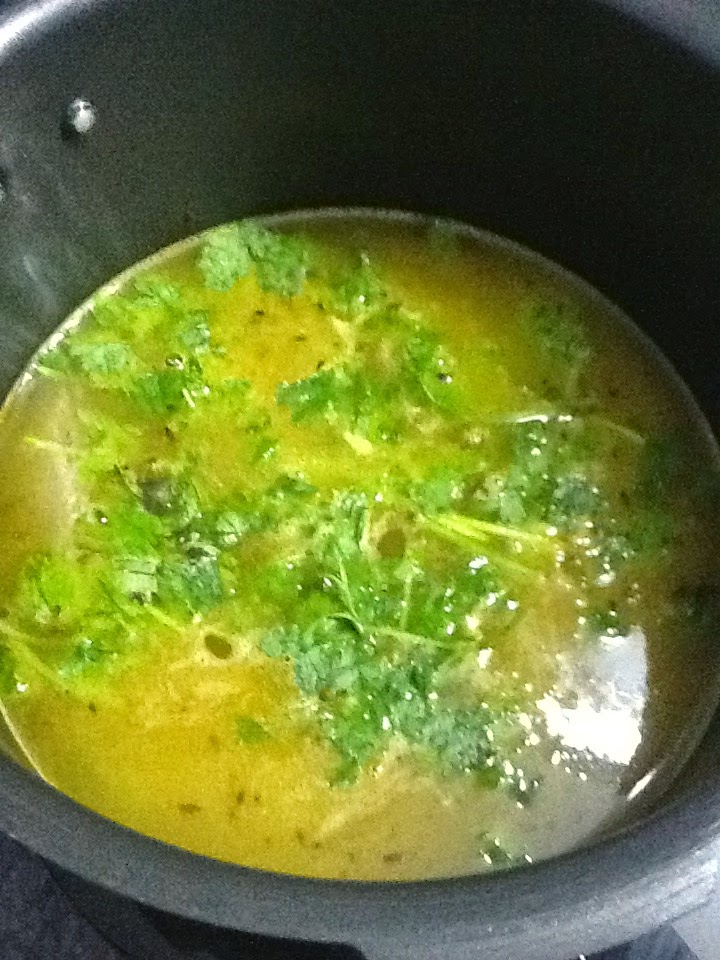
7.)Add sufficient water for the kichidi and garnish coriander leaves.


(Since i used basmati rice here and soaked it already for 20 mins before cooking, i added 1 and a half cup water for each cup of rice since i want it very soft ).

8.)Pressure cook it for 4 - 5 whistles .

Now serve Hot Hot Moong Dal kichidi!!!!!!!!!!!!!!!!!!!!!


Note:

1.)IF you are using ghee then it's fine or at the end before pressure cooking it just add a drop of ghee if your willing so that it tastes more good.

2.)You can add veggies to this to make it more healthier like carrot,onions,green peas etc.

Bon Appetit!!!!!!!!

Ishwarya Balaji!!!!!!!!!!!!!

Friday, 6 March 2015

Vegetable Kootu Recipe/South Indian Cuisine-

Hello Everyone!!!!!!!!!!!!!!!!!!

Sorry for the delayed posts for these many days as i was totally messed up with lot many things and so was literally having no time to sit and post eventhough i clicked pictures for many dishes already.

Today we are going to South Indian Vegetable Kootu which is a traditional one in all families  Kootu is generally relished by everyone in the family. I am a great lover of kootu as i take only kootu with rice while my husband takes it as a side dish only. If kootu is there i will not touch any other side dish for rice. This is the most usual way i do kootu but i add less coconut.I make the kootu little thinner and in many places they add tomato while grinding the coconut.But i dont use tomato.If you want you can add and see. So now let's see how to make kootu.

Cooking Time                           :  20 Mins

Serving                                     : 3 - 4 people

Ingredients:

1.)Veggies                               - 2 Cups(Ref my measurements post)

2.)Moong Dhal                       - 3 teaspoons (Normal big spoon)(Ref my measurements)

3.)Salt                                     -As required

4.)Red Gram                          - 3 Teaspoons (Normal big spoon)(Ref my measurements)

5.)Water                                 -As required to boil the veggies and dhal

6.)Green chillies                    -As required

7.)Coconut                             -As required

8.)Jeeragam                           - 2 Teaspoons(Normal big spoon)(Ref my measurements)

9.)Oil                                    - To temper

10.)Mustard seeds                -To temper

11.)Turmeric Powder          -A pinch

12.)Coriander Leaves         - To garnish

13.)Green peas                   - 1 cup(Ref my measurements)


Method:

1.)Add the veggies and both the dhal(NO.2 & 4 ) and add sufficient water to boil the veggies.Here i have added rajma also.Soak the required rajma overnight itself.Rajma has high protein value. 


2.)Pressure cook this for a good number of whistles and keep it aside.


3.)Heat a kadai and add some oil and temper the mustard seeds.


4.)Now add the boiled veggies along with the water boiled.When you add the boiled veggies water it will give a seperate and superb taste.


5.)Add a pinch of turmeric powder and mix well.


6.)Grind green chillies according to your spice requirements along with coconut and jeeragam/jeera.


7.)Add this grinded paste and mix well the whole kootu. Now add green peas and mix well


8.)Garnish coriander leaves and have your hot kootu.


Note:

1.)Always have kootu in hot form so that you will relish the original taste.

2.)Do not reheat the kootu too many times as the taste will reduce.

3.)Do not use you hands for anything because coconut is there,sometimes it may get spoiled. 

4.)If you want you can add tomato while grinding .It will give a different taste but it will also give a good taste. 

5.)You can add veggies of your choice but try to add some protein rich like rajma,channa etc. If so soak them overnight. 

Bon Appetit!!!!!!!!!!!

Ishwarya Balaji